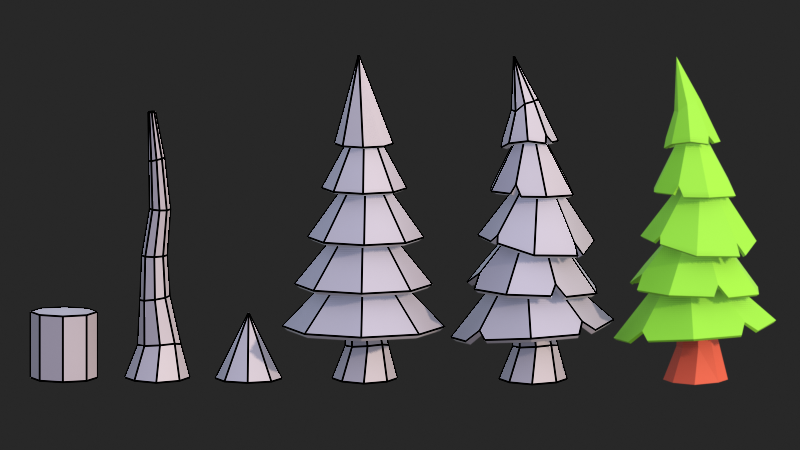
Create A Low-Poly Tree in Blender
If you’ve ever admired the stylised, blocky look of low-poly art, you’ll be glad to know it’s actually one of the easiest ways to start learning 3D modeling in Blender. What I love about it is how simple shapes can come together to form something really eye-catching. Since low-poly uses fewer polygons, you don’t have to worry about tiny details or complex techniques—you can just focus on the fun part: building.
When I first started experimenting with low-poly, I was surprised by how quickly I could make something that looked good. It’s a relaxed, playful way to get comfortable in Blender, and it gives you plenty of room to explore your creativity without feeling overwhelmed. In this tutorial, I’ll walk you through the steps I used to create a simple, stylised tree—perfect for practicing the basics while ending up with a model you can actually use in a scene.
Before We Start
Before jumping into the tree, let’s make sure you’re comfortable with Blender’s basics. A little warm-up now will save you headaches later.
- Practice moving the camera around your scene.
This helps you view your model from different angles while you work. - Switch between Object Mode and Edit Mode.
Object Mode moves whole objects, while Edit Mode lets you shape individual vertices, edges, and faces. - Use the Move (G), Rotate (R), and Scale (S) tools.
These are the bread and butter of modeling in Blender.
Once you’re comfortable with these, you’re ready to build your low poly tree!
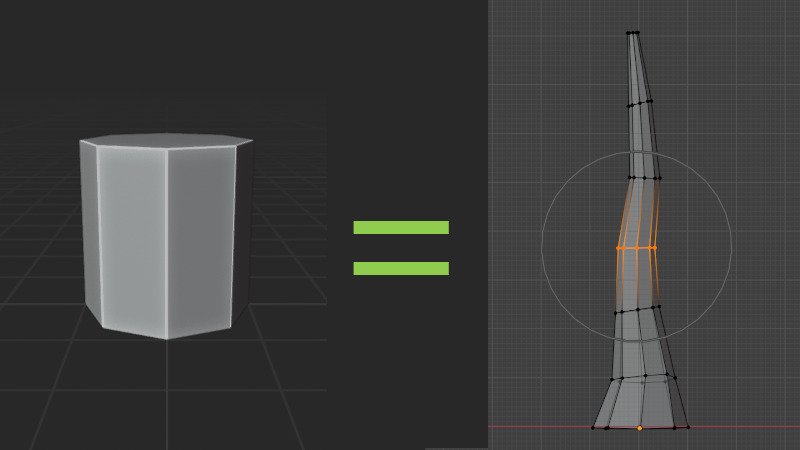
Step 1: Build the Tree Trunk
We’ll start by shaping a basic tree trunk from a cylinder.
- Press Shift + A → choose Cylinder.
In the options, set the vertices to 8 for a chunky, blocky look. - Press Tab to enter Edit Mode.
Use Alt + Left Click to select the top vertices, then press S to scale them in. - Press G + Z to pull the top up to the height you want.
This forms the trunk’s basic shape. - Press Ctrl + R to add loop cuts, scroll your mouse wheel for more cuts.
This adds geometry so we can bend and shape the trunk later. - Switch to the front view (1 on the numpad) and press Alt + Z to enable X-Ray mode.
This lets you grab both front and back vertices. - Turn on Proportional Editing (O) and move rows of vertices with G.
Toggle X-Ray off when you’re done.
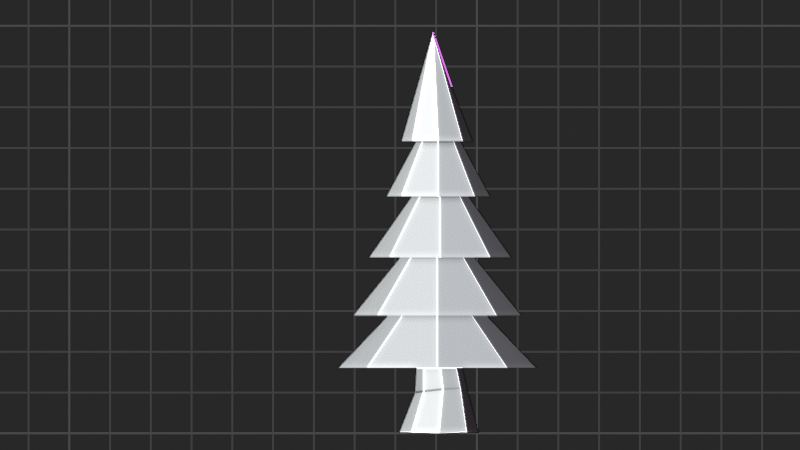
Step 2: Shape the Foliage
Now let’s stack some cones to create leafy layers.
- Press Shift + A → choose Cone.
In the options, set the Vertices to 8. - Go into Edit Mode, press 3 for face select, select the bottom face, and press X → Delete Face.
This leaves the cone open at the bottom. - Press S to scale it wider, then G + Z to move it up.
This will be the lowest layer of foliage. - Press Shift + D to duplicate the cone, move it upward, and scale it slightly smaller.
Repeat this two more times for 3–4 stacked cones. - On the top cone, press S + Z to make it taller and more pointed.
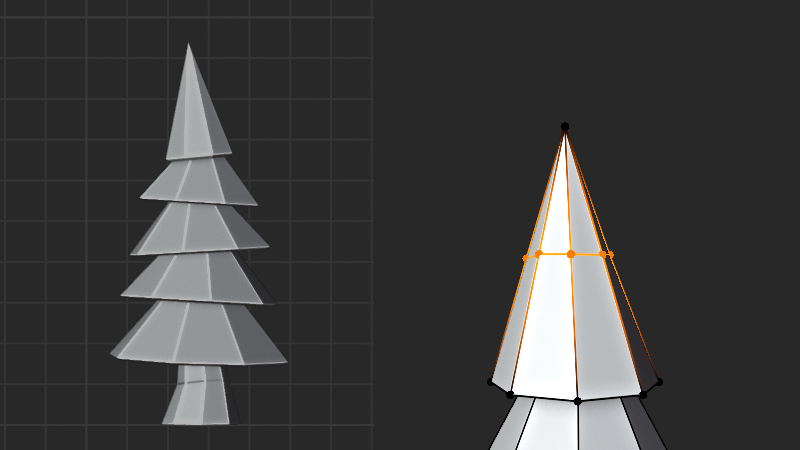
Step 3: Add Variation
Cones are made of triangles, so loop cuts don’t work well here. Instead, let’s add some variation.
- Press K to use the Knife Tool.
Cut a loop around the cone’s middle, making sure to orbit and cut the back too. - If you accidentally create extra vertices, select them and press X → Dissolve Vertices.
- Select the top vertex of a cone, press G, and move it slightly to the side.
This breaks the symmetry and feels more natural. - Duplicate and rotate some cones so they don’t line up perfectly.
Stacking at slight angles adds an organic look.
Step 4: Add Thickness & Cutouts
Let’s give the foliage more depth and carve out some chunks.
- Select the cones, in object mode, press Ctrl + A → Apply Scale.
This ensures modifiers behave correctly. - Hold Shift and click the cones one by one, then press Ctrl + J to join them into a single mesh object.
You can still move or rotate each cone individually by pressing L while hovering over one of its faces in Edit mode. - Add a Solidify Modifier to each cone.
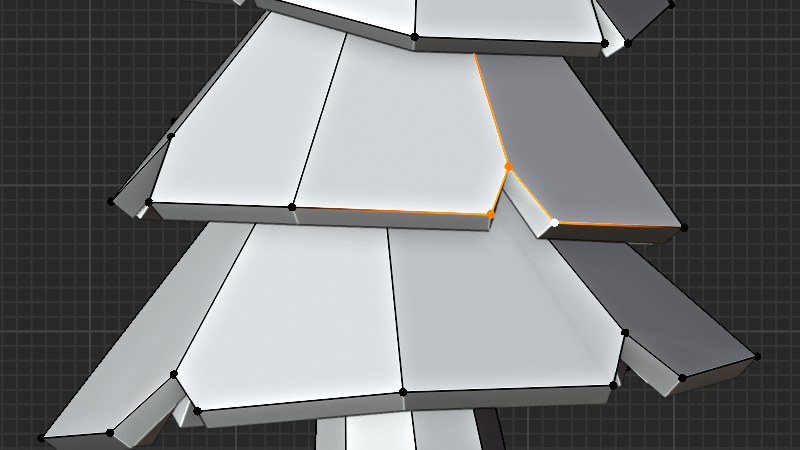
Set the thickness to around 0.1 to avoid paper-thin leaves. - Go into Edit Mode, switch to Vertex Select (1), and use the Knife Tool (K) to cut small triangular shapes.
Switch to Face Select (3) and delete those faces. - Because of the solidify modifier, the cuts look clean and add nice variation.
Do this randomly across the foliage for a more natural tree. - For even more variety, select some of the vertices along the edges of the cones and move them slightly downward.
This makes certain sides look longer, breaking up the symmetry and giving the foliage a more organic feel.
Step 5: Add Materials
Now let’s make the tree come alive with color.
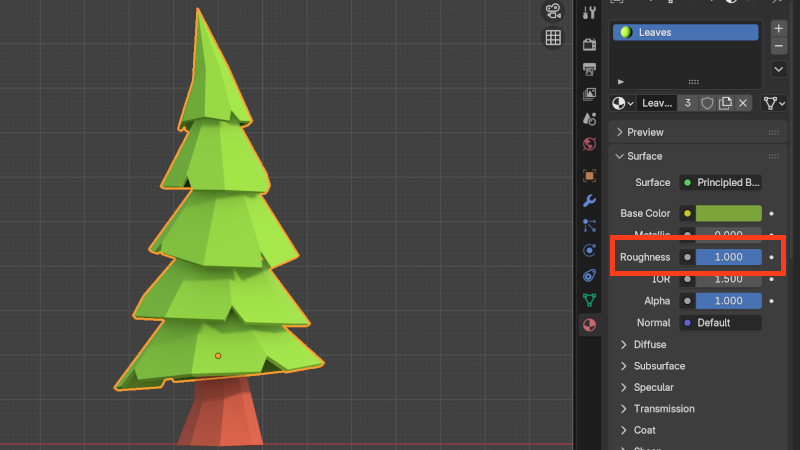
- Assign a simple brown material to the trunk and set the Roughness to around 1.
Even a flat brown works great for low poly. - Give the foliage a nice green material.
Try using a few different shades of green for variation.
Step 6: Render Your Tree
Now that your scene is ready, let’s grab a quick render straight from the viewport:
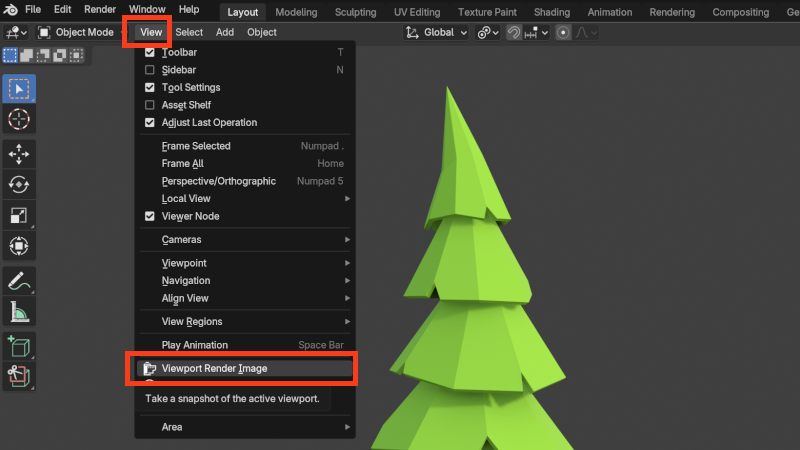
- Go to the top menu → View → Viewport Render Image.
- A new window will open with your snapshot of the active viewport.
- Save it via Image → Save As.
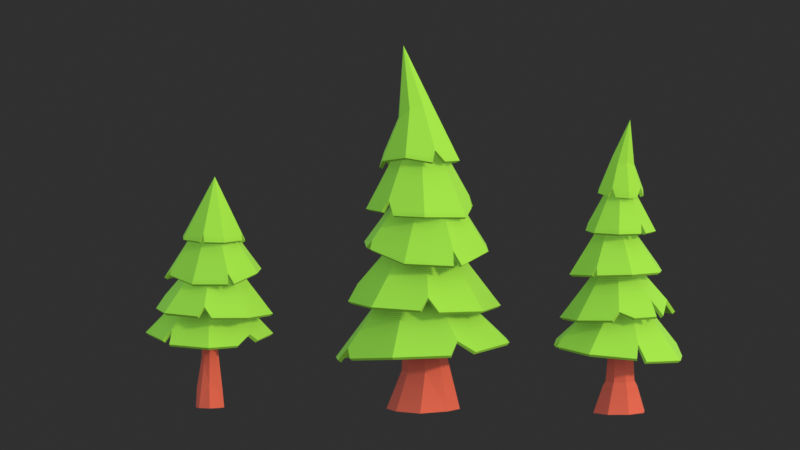
- Viewport renders are perfect for quick previews, thumbnails, or sharing work-in-progress — no long render times needed.
- Use Eevee for fast, high-quality renders, and in Color Management, set View Transform to Standard and Look to High Contrast or Very High Contrast to make colors pop.
- For an extra guide, check out this quick YouTube tutorial.
Want to dive deeper? Check our full guide on Quick and Easy Blender Viewport Render or download the PDF for offline reference.
Step 7: Refine Your Models
Once your shapes are in place, tidy them up to achieve that polished low-poly look:
- Parent foliage and trunk to an Empty (select the Empty last and press Ctrl + P).
Scale the Empty to adjust the tree without losing modifiers. If you join meshes later, apply modifiers first. - Use the Decimate Modifier to reduce polygon count and simplify your model.
- Optionally, try the Subdivision Surface Modifier for subtle smoothing — don’t overdo it!
- Apply Flat Shading to emphasize that classic low-poly style.
These tweaks make your models look cleaner and intentional, while keeping the playful low-poly charm.
Step 8: Keep Practicing
The more you create, the more comfortable you’ll get in Blender. Low-poly modeling is a fun way to experiment, learn, and build your skills. Don’t worry about perfection — every object is a step forward, and practice makes you more confident and creative!
Download the File
If you’d like to check your work or grab the finished tree, download the .blend file here:
“Great artists weren’t born great — they grew through practice. Stay curious, stay patient, and keep modeling. ” ― Your Creative Journey