Quick and Easy Blender Viewport Render
In this tutorial, we’ll walk through how to create a clean, quick viewport render in Blender. It’s simple, fast, and perfect for sharing your work-in-progress without waiting on long render times. Let’s jump in!
Step 1: Set Up EEVEE
We’ll start by making sure Blender is ready to give us a clean viewport render.
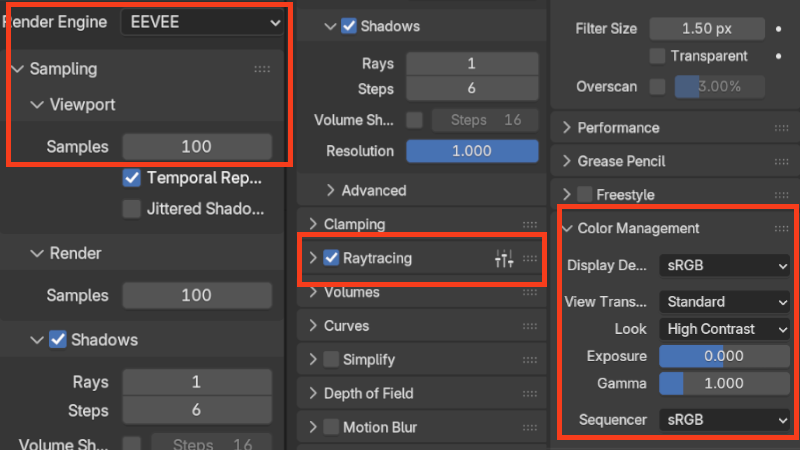
- Go to Render Properties and set the engine to EEVEE.
This is the best option for quick renders. - Increase Viewport Samples to around 100.
Higher samples reduce noise in your preview. However going too high will slow things down without much visible improvement for a quick render. - Enable Raytracing for more accurate lighting and reflections.
Next, we’ll make sure your colours pop the way you want them to.
- In Colour Management, leave View Transform set to Standard.
Standard works best for non-photorealistic or stylised results. For realism, try AgX (newer, film-like) or the older Filmic (high dynamic range). - Change Look to High Contrast or Very High Contrast.
Experiment until your scene looks right.
Step 2: Use Material Preview Mode
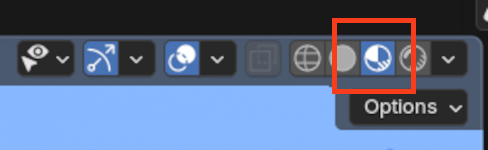
To see your materials with environment lighting, switch to Material Preview.
- Click the Material Preview shading mode at the top-right of the viewport.
- This loads Blender’s predefined HDRIs to simulate realistic lighting.
Step 3: Hide Overlays
Before rendering, we need to clean up the viewport.
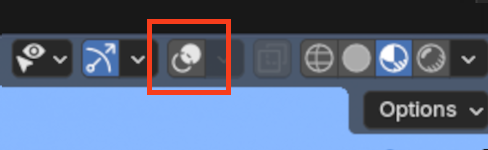
- Toggle Overlays off (top-right of the viewport).
This hides things like gizmos, grids, the 3D cursor, and preview spheres.
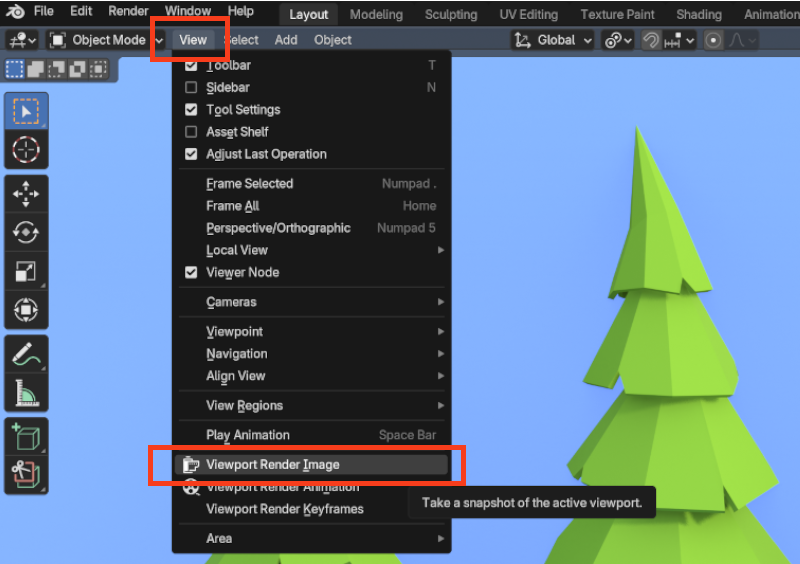
Step 4: Render and Save
Now everything is ready to capture your scene!
- Go to the top menu → View → Viewport Render Image.
- A new window will open with your snapshot of the active viewport.
- From there, go to Image → Save As to save your file.
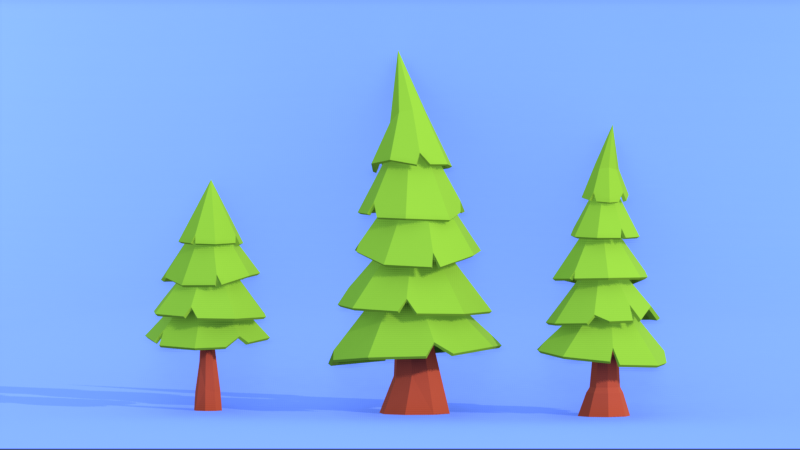
🎉 All done! You now know how to grab a fast, clean viewport render in Blender. Use this technique whenever you need a quick snapshot without waiting for a full render.
Happy blending!
“Every render is a small step forward. Don’t chase perfection — enjoy the process, learn from each scene, and let your skills grow naturally. ” - Creative Notes on Blender