GIMP (GNU Image Manipulation Program) is a powerful, free, open-source software often considered one of the best alternatives to Photoshop. It works on all major operating systems and can be downloaded and installed easily.
The most recent release is GIMP 3.0.4, which includes the latest updates and improvements to enhance your editing experience.
For Windows users, GIMP runs on Windows 10 or newer. Make sure your system is up to date before installing to ensure the best performance.
Before downloading, we recommend visiting the official GIMP website at gimp.org, where you can confirm the newest version and find additional information about the software.
If you have not installed GIMP yet, this step-by-step tutorial will guide you through the process quickly and simply.
Step 1
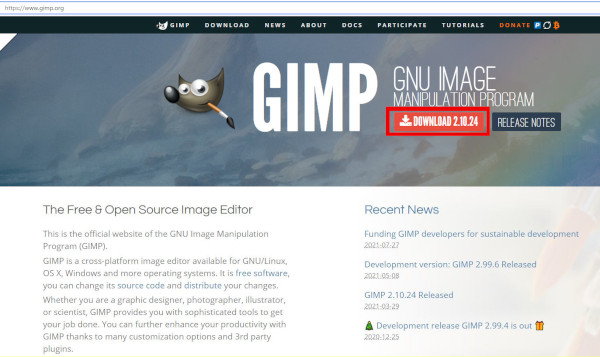
Go to the official GIMP website at gimp.org and download the latest version of the software. At the time of this tutorial, the most recent release is GIMP 3.0.4. If a newer version is available, don’t worry — the steps in this guide will still apply.
- Click the download link in the large orange box to open the download page.
Step 2
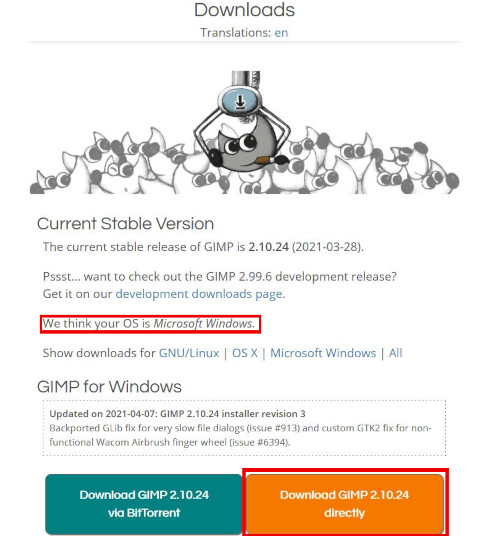
Here you will see the current stable version available for your operating system. The website automatically detects your OS — in this example, it shows the Windows version.
There are three download options: BitTorrent, Direct Download, or the Microsoft Store.
- For this tutorial, we’ll use the Direct Download option. Just click the link in the orange box to begin downloading.
Step 3
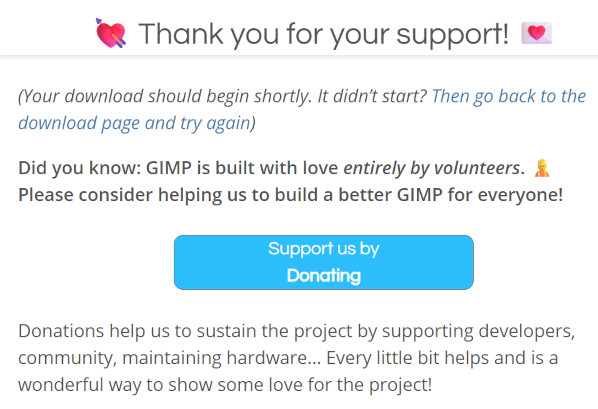
After clicking the download button, you’ll see the “Thank You for Your Support!” page. Here, you have the option to support GIMP by making a donation.
Donating helps sustain the project and supports the amazing community of developers who keep GIMP free and continuously improving. Even a small contribution makes a difference!
Step 4
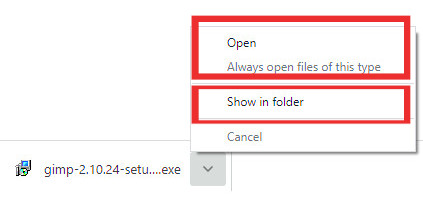
Once the download is complete, open the .exe installer from your browser or locate it in your Downloads folder and run it.
Step 5
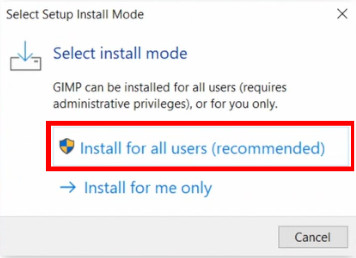
You can choose whether to install GIMP for all users on the computer or just for your own account.
- The recommended option is to install for all users on this computer. This usually requires administrative privileges.
Step 6
On some systems, the User Account Control (UAC) dialog may appear, asking if you want to allow the app to make changes to your device. This is the administrative approval mentioned in the previous step.
- If you see this dialog, select Yes to continue. If it doesn’t appear, don’t worry — the installation will still proceed normally.
Step 7
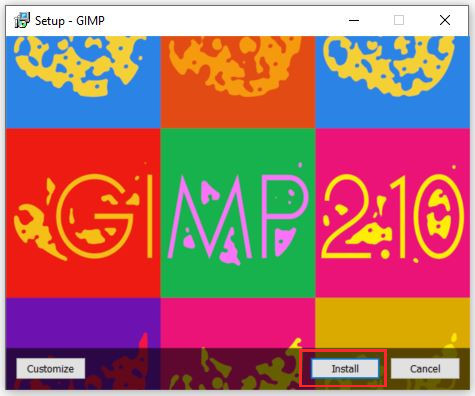
GIMP gives you two options: Customize or Install.
Choosing Customize lets you review the GNU General Public License (GPL), adjust settings, and select which components to include.
- For this tutorial, we’ll select Install to continue with the standard setup.
Step 8
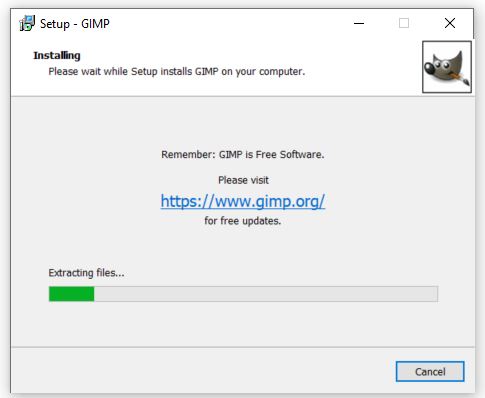
The installation is starting! This part usually only takes a few minutes, so just sit back and relax while GIMP sets up on your computer.
Step 9: Opening GIMP for the First Time
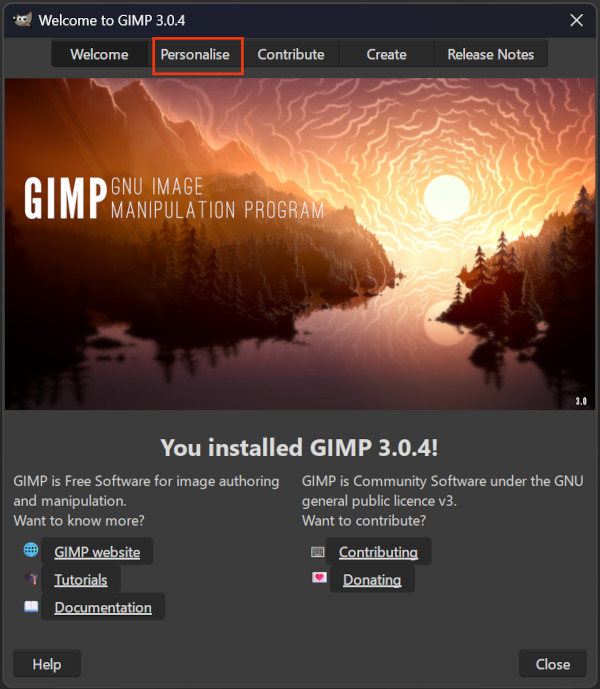
When you open GIMP for the first time, you’ll see the splash screen. This is a great place to quickly adjust some important settings before diving in.
From the menu, go to Personalize. Here you can make the program feel more comfortable for your workflow:
- Language: Choose your preferred language. We selected English and clicked OK to continue.
- Theme Color: Pick a light or dark theme depending on your preference. A darker theme is easier on the eyes for long editing sessions.
- Icon Scaling: Adjust the size of toolbar icons. For tutorials or videos, I personally make the icons bigger so they’re easier to see on screen.
- Font Size: Increase the font size in menus and dialogs. This also helps make your workspace more readable when recording tutorials.
Tip: You can always change these settings later from the Personalize menu if you want to try something different.
Once you’ve personalized these settings, GIMP is ready to use! Making these adjustments at the start can save time and make your editing experience much smoother.
Wrap Up
![]()
That’s it — we’re all set!
Now you’re ready to open GIMP and start exploring this amazing, powerful, and free software. Have fun experimenting!
To help you get started, we’ve put together a couple of videos from our GIMP For Beginners series:
1. Getting to Know the GIMP Interface
New to GIMP and not sure where everything is? This video gives you a thorough tour of the interface. You’ll see how to change themes, set up single or multi-column layouts, and much more.
2. Saving and Exporting Images
This popular video covers everything you need to know to get started in just 8 minutes. Learn how to start a new project, open images, and save or export your work. Highly recommended for all beginners!
If you want to keep learning, check out the next videos in our beginners series:
Enjoy and happy editing!